versaSRS Migration Plan
The following steps will help with migrating the versaSRS application and/or the database to a new server:
versaSRS Application
1. Stop all versaSRS Windows Services on existing server
2. Break URL access to versaSRS (this includes all web URLs related to versaSRS). This will ensure no one can access the application, in case they make any changes or update any records. If any changes are made the backed up data will be out of sync with the database.
- SRSConnect
- versaAssetsWebService
- versaChatWebAPI
- versaSRS
- versaSRSWebServices
- versaSurvey
NOTE: If SRSConnect or versaSurvey is published on a different server for public access, ensure those URL are also not accessible
3. Copy application folder to new application server - Copy all directories from C:\Program Files (x86)\VersaDev\versaSRS
NOTE: Above is the default installation path, your application may be located elsewhere
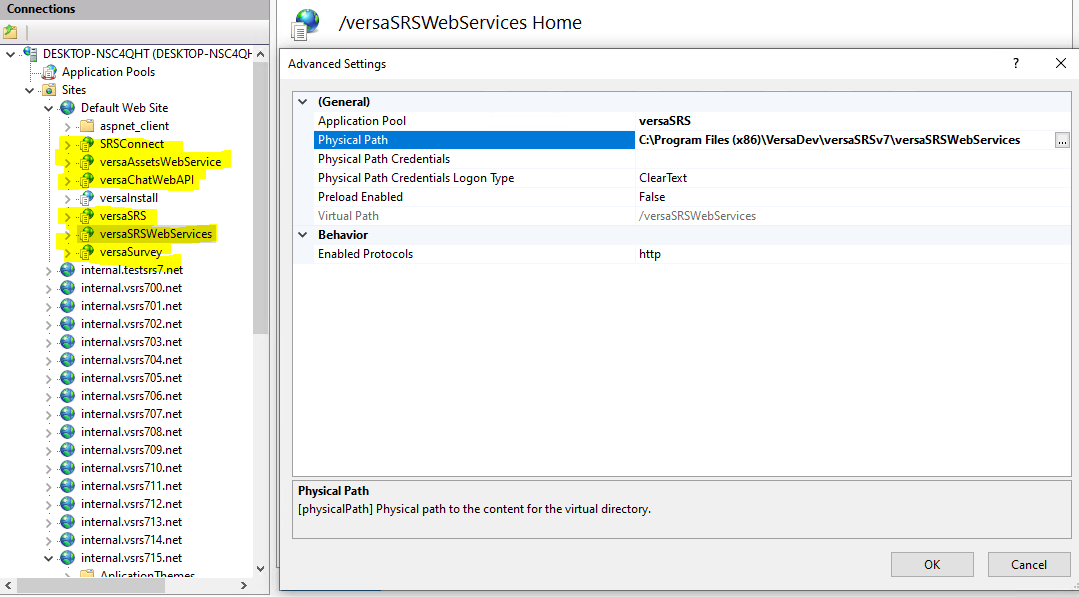
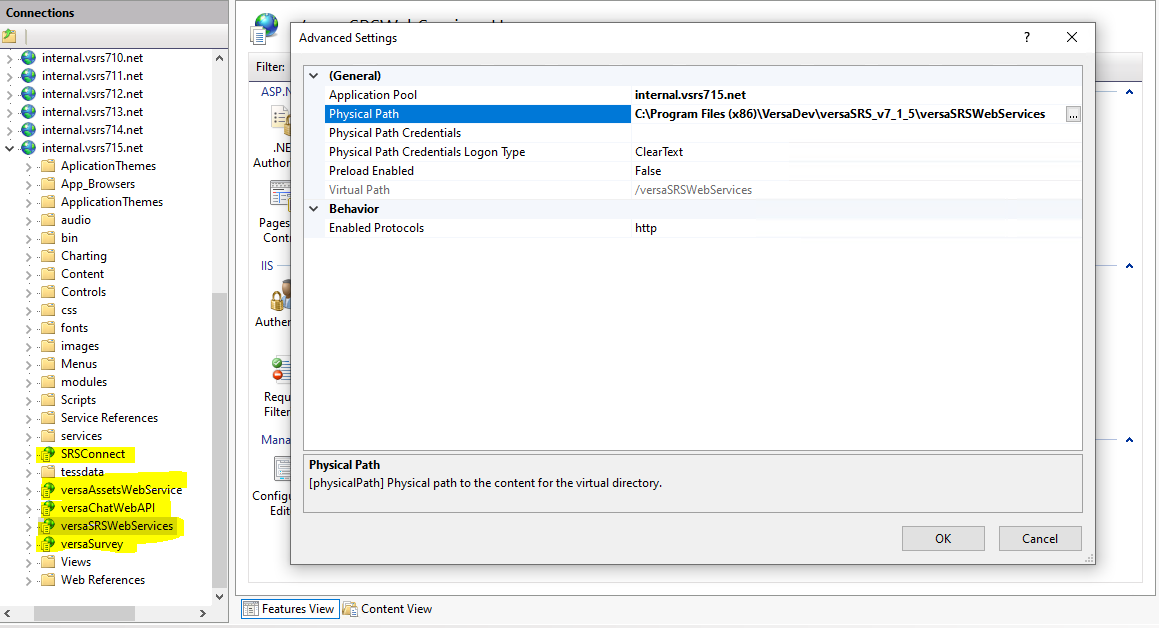
4. On new server in IIS, under the Default Web Site or a custom site you've created, select Add Application... and add the following listed names as the Alias, be sure to specify the correct physical path
- SRSConnect
- versaAssetsWebService
- versaChatWebAPI
- versaSRS
- versaSRSWebServices
- versaSurvey
Default Web Site Installation - NOTE: There is no need to create the versaInstall Application, that Application is created and used internally by the default install wizard

Custom Site Installation - NOTE: The versaSRS Application isn't defined as the site address is set to take the user to the main versaSRS page

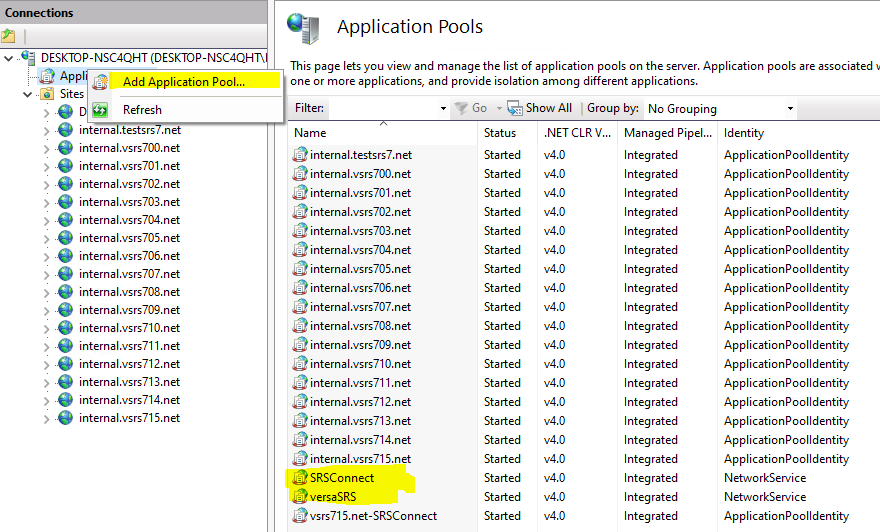
5. Right click on the Application Pools list to create an Application pool named SRSConnect, and another named versaSRS - only follow this step if planning to use alternate authentication methods for these potentially external facing applications. If not skip to step 6.

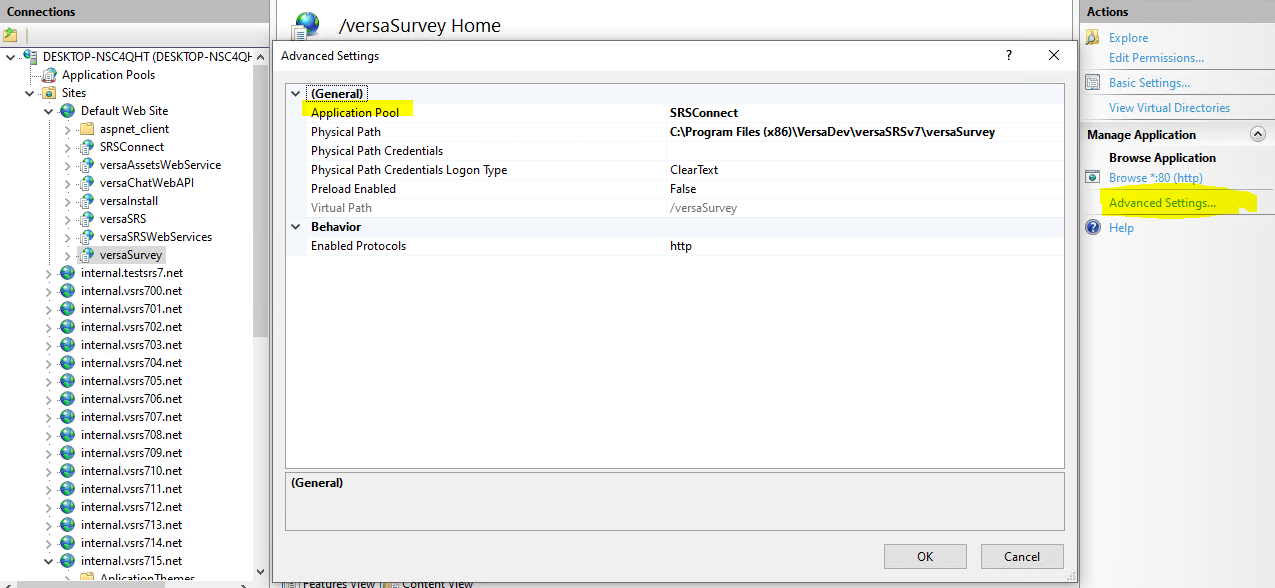
In the Advanced Settings, for the Applications you added in Step 4, ensure SRSConnect, versaSurvey, and versaChatWebAPI are in the SRSConnect Application Pool, and that the others are in the versaSRS Application Pool.

6. Install versaSRS Services - located in the versaSRSWindowsServices folder.
Run command prompt as an Administrator, navigate to the directory containing versaSRSWindowsServices, and run the installsrs.cmd file. The name specified at the end of the command will be the instance name of the Services - we recommend specifying an instance name if you wish to run multiple versions of SRS e.g. if you have a test and production environment on the same server.


7. Install versaSRSServiceMonitor - located in the versaSRSServiceMonitor folder.
Run command prompt as an Administrator, navigate to the directory containing versaSRSServiceMonitor, run the install.cmd file. The name specified at the end of the command will be the instance name of the Services - we recommend specifying an instance name if you wish to run multiple versions of SRS e.g. if you have a test and production environment on the same server.

8. Browse to all URLs and ensure they are working
9. Start Windows Services
NOTE: Before starting the Services run the necessary query/ies from the following queries in SQL Management Studio to determine if the mailboxes are set up correctly
Single Mailbox Setup:
SELECT * FROM tbl_ApplicationSettings
WHERE Name LIKE 'mail%'
OR Name LIKE 'smtp%'
ORDER BY Name
MultiMailbox Setup:
SELECT * FROM tbl_Mailboxes
SELECT * FROM tbl_ApplicationSettings
WHERE Name LIKE 'mailout%'
OR Name LIKE 'smtp%'
ORDER BY Name
10. Confirm email, scheduling, and monitoring services are working correctly
versaSRS Database
NOTE: Only perform these steps if moving the current database to the new server
1. Backup versaSRS database - Use SQL Management Studio (Right click versaSRS database > Tasks > Backup)
2. Copy database backup to new server
3. Restore database to new database server - Use SQL Management Studio (Right click Databases > Restore Database)
NOTE: If you are using a specific SQL account to connect to the database you will need to ensure those credentials are in the Logins folder in SQL Management Studio
*4. Update all connection strings, including the ones in the versaSRS Web.config file. Use the versaSRS Global Settings to update DSN entries.
If you cannot utilise the Global Settings via versaSRS, execute the following SQL query via SQL Management Studio to identify which values need updating
SELECT * FROM tbl_ApplicationSettings WHERE TypeID = 6
Value1 = [SERVERNAME]
Value2 = [DATABASE]
Value3 = [SQLUSER]
Value4 = [SQLPASS]
*5. Update the connection string in the versaSRSDSN.xml file, located in the VersaSRSWindowsServices folder. This is for the Mail Services.
* The last two steps are optional steps you can perform to ensure the connection strings are connecting to the correct versaSRS database